Kindly follow the below-mentioned steps to start recording the "Enhanced Conversions" in your Google Ads account once you have set it up in AdNabu's conversion tracking app.
Please note that for certain Google Ads accounts, the Enhanced Conversion feature is automatically set up. However, if you find that this setup is not done for your Google Ads account, you can follow the steps below to complete the setup manually.
Follow the below-mentioned steps to start recording the Enhanced Conversions in your Google Ads account once you have set it up in AdNabu's conversion tracking app.
- Please refer to the help article on this link to complete the setup in the app first.
- Sign in to your Google Ads account and go to the below path:
Tools & Settings --> Measurement --> Conversions - You should find the AdNabu pixel in the list. Kindly click on that.
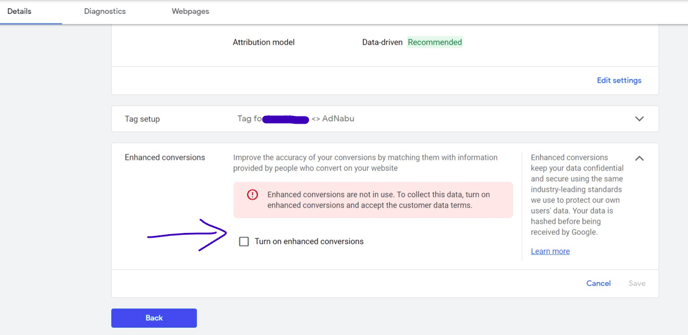
- Under the same Details tab, you should find the section of Enhanced conversions at the bottom, click Turn on enhanced conversions as per the screenshot.

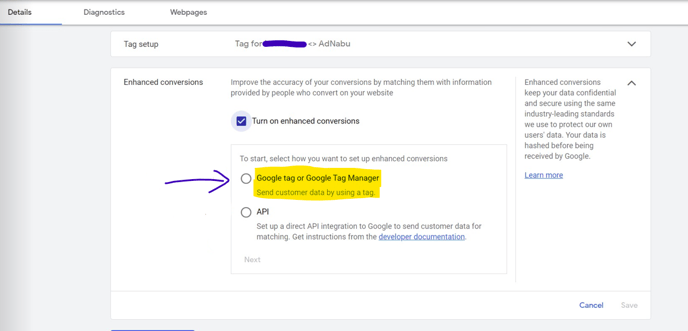
5. You then need to select the option of Google Tag or Google Tag Manager in the next step. Kindly check the below screenshot for reference.

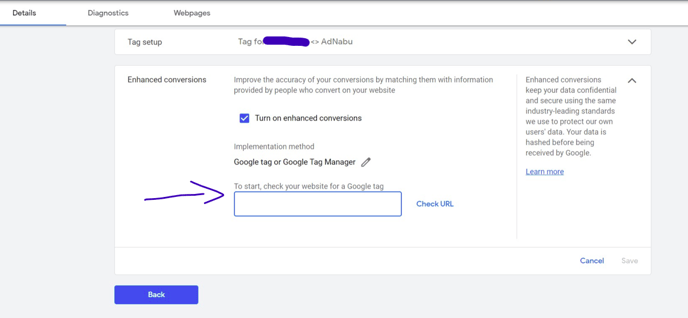
6. The next option will ask you to paste your website's URL in the box as you can see in the below screenshot. Its okay to paste the URL along with the https:// parameter.

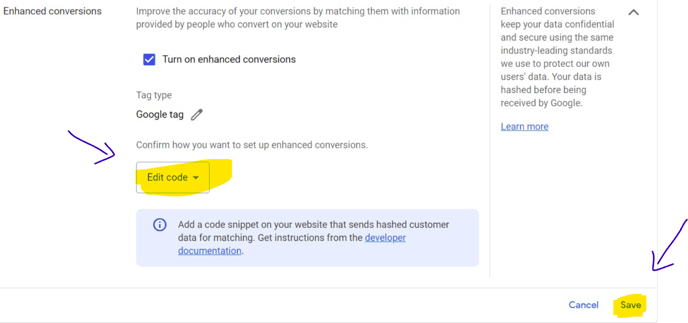
7. Then you simply need to select the option of "Edit Code" and then click on the "Save" button. Kindly take reference from the below screenshot.

8. Do note that the AdNabu app has already edited the code and you don't need to change anything by yourself. Just click on the Save button and the setup of "Enhanced Conversions" is done.
A few days after you set up enhanced conversions, you'll see "Recording conversions (enhanced conversions detected)" in your "Status" column. This means Google is currently processing your enhanced conversion data and will notify you once it's integrated into your conversion action.
